I checked to see if I can use the optional accessing door. It requires about 1 inch of margin all around for the frame.
here is roughly how it would align with the toilet; also the hinges needs to be on the RHS
i line up the LHS of the opening with the back wall of the bathroom here; there is actually enough overhand on the plywood that is the back wall of the bothroom to accept the frame
now i slide the frame up to the height it ought to be and seems like the bottom would also be OK
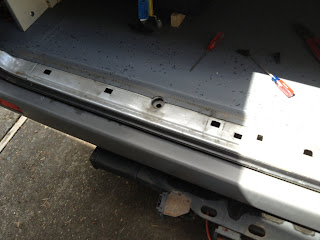
i remove the plastic threshold to check for rust
all is good, the brown residue is just dirt
I got the sink cabinet out. Once I figure out how it comes out it is not that hard. It just requires careful work so not to damage anything.
now i can see how badly the faucet hose is twisted and binded - it actually formed memory and no amount of struggle from the user can untwist it from above; i exercise it up and down with the benefit of able to see the hose in the imaginary triangular tunnel and it forms a kink at the tight spot at the top immediately when I push the hose in after extending it
Removing the black tank took a lot of work if you try to save everything. I got to see the impeccable engineering by Westfalia. The engineers gone to hell to maximize the black water tank. Everything is tightly fitted. There is just enough space used for everything to come together. The tank is Westfalia custom part. Someone must lost a shirt that only 250 of the NAFTA JC were ever imported. I am sure the join venture left both sides with very sour taste.
after a few hours of hard work I manage to remove the shower pan in one piece and did not even scratch up anything; westfalia has done such impressive design for serviceability
look at all the space that will be available for storage; the less obvious is i will not need to carry the 3" diameter dump hose and the fittings; i will just carry a 3/4 inch dia hose
Right now I can see the light at the end of the tunnel. I knew I was right all along and no one is going to tell me why bother with so much trouble with the conversion. The most difficult task is the fiberglass work on the shower pan. Having removed it out of the bathroom make it so much easier to lay fiberglass on it.
26.05.13 11:59 PST Update:
It is a touch and go day in Portland today. Shower will be moving in again. I managed to take advantage the better weather before noon to work on the shower pan. Because of the complex contour marking a straight line to guide the cut brings some challenge. I was quite frustrated that how slippery it is. Keeping a straight edge on it and transfering the cut line using my Japanese knife was what I did. The flat left side if the Japanese sushi knief allow me to transfer the line down 1.5 inchs down from the straght edge.
The slippery surface clued me in the shower pan is acrylic, not ABS as I previously inferred. Acrylic make perfect sense given the small product quantity of the NAFTA James Cook.
Acrylic is a material that can be heat formed with relative ease. It can also be jointed with just using acetone. These can be done by most enterprising hobbiests. However in my case because of the raised platform it would be very difficult to heat form it back to a flat sheet in the area.
Right now my plan is to first cut the pan into the final length and also cut off the arc around the raised platform base. I plan to use my wood working bandsaw with a fine tooth wood blade for the straight cut. The curve base of the raised platform will be cut with the Fein Mutimaster.


No comments:
Post a Comment