Some may wonder why does it take so many posts to change a freaking toilet. Just get on with it. The truth is I would take far less time deliberating and planning if I am renovating a bathroom in the house. In this project there is just too much riding on it and a misstep would lead to regrets. The experienced carpenter will measure twice and cut once. In this project I am measuring 5 times and cut once.
the fein multimaster arrived
After a week of early summer like weather the weather snapped back to early spring like with blustery winds and incessant drizzles. That put a stop to the progress.
The adhesion test I did a few days ago proves epoxy resin is ill suited for the option of converting and reusing the existing shower pan. Epoxy resin would be the right choice for using the existing pan as a mold to build a new one however.
It is quite clear to me now I have a number of safeguards to cut into the existing shower pan and if the conversion process goes wrong. My current plan is:
1) Proceed with the option of modifying the existing shower pan. That will requires the ability to perform a clean cut along the front base of the cassette toilet. I then will test bond fiberglass cloth to the presumed ABS pan using polyester resin. I would use the cut off scraps of ABS to do the test. If the test shows it is not a good plan I would resort to (2)
2) I will use the existing pan and make necessary work to turn it into a mold in which a home made pan would be frabricated in situ with fiberglass cloth layup using epoxy resin. In situ means I cannot remove the existing pan from the bathroom without destroying it because it is held down by mastic or bedding compound. Once the new pan is layup and cured it should pop off the "mold". The old pan can then be broken into manageable pieces and removed. If this fails I would resort to (3)
3) Option 3 is to procure the Westfalia shower pan for the European James Cook. Should this option fails I would resort to (4)
4) Option 4 is lay a shower floor like you would in a residential shower.
Here in Portland a good place for a one stop shopping for the needed fiberglass material is Tap Plastic.
resin comparison chart
i selected the bond coat (standard issued) polyester resin
the catalyst for polyester resin
by mixing white pigment into the resin it will hide the void left by the platform
there are a lot of choices for the cloth and i am leaning towards a heavier weight for faster layup; the trade off is lighter cloth will give finer weaves
fiberglass fabric selection chart
this is an excellent video they produce - after viewing it i am leaning towards using at least some mat around the drain hole
I did made some progress. I removed the toilet flange so I can see the cross section of the shower pan. I was very surprised to see how beefy it is. It is of very high quality, better than even the best one for residential bathroom here in USA that I have ever seen. What is most impressive is the impeccable quality and bombproof construction for the toilet. Between the plywood subfloor and the raised platform of the shower pan are 3 layers of perfectly cut European plywood (these plywood do not have voids like even A-grade made in the US).
the toilet flange removed
closeup you can see the cross section of the pan
it is 0.17" (4mm) thick
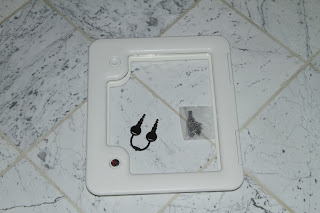
Something I realize. I may not be able to use the Thetford optional access door kit I purchase. The opening may too close to the plywood panel of the rear wall of the bathroom for even the thin frame of the door kit.
optional access door kit


No comments:
Post a Comment