
The last set of parts for the suspension just arrived. Thinking though the procedures I came to a conclusion that I can separate the project into two parts without incurring additional work. One is the suspension system, and the other the engine/drivetrain. I would do the drivetrain first and I would have a chance to test drive the car in between the two parts.
the Hotchkis rear camber arms just arived; these are the last parts that are needed for the suspension modifications

I searched high and low trying to find this pair of cheap (toy) coil spring compressors; I cannot remember did I throw them away; the last time I used them was in 1980s!

we have two days that are dry and forecasted to be sunny of lower 80s; I decided to proceed with the suspension modification rather than doing the entire project

by 10 AM the sun was already relentless; I should had started much earlier

removing the skinny factory rear sway bar - to be replaced with much thicker 22mm Alta sway bar

removing the rubber cover for the rear damper's lower mounting bolt

the rear damper's lower mounting bolt on the passenger side was the only fastener that gave me a hard time; it has the most amount of surface rust and my Earthquake 1/2" impact wrench would not lossen it.

the right side rear spring damper assembly removed

the Koni Yellow and Swift spring that I would be installing

11:18am and it is getting hotter

having have to compress the springs with the compressor without a ratchet closed-end wrench wasted me a lot of time

the difference between the stock (left) and Koni (right) due to the rebound adjuster; many said that you should cut the bump stop (the yellow mushroom on the stock shaft) but I chose to take a cautious approach and not cut it as the Swift spring would lower the ride height only by 3/4 inch

the spring free heights (Swift on left and stock on right)

removal and installation of the rear sway bar requires lowering of the rear subframe; the Alta 22 mm bar is much beefier than the skinny stock sway bar of circa 16.5 mm; at this time I was very apprehensive that the 22 mm bar would be too stiff ; I set the new bar to the softest setting

2:56 PM and it had become unbearably hot working under the relentless sun on a concrete driveway

It became so hot and miserable the rest of the afternoon that I didn't take any more photos. All I wanted to do is to finish the rear suspension modifications before sunset.
by 7:11 PM I have the rear suspension modification all done just when the big tree shaded the driveway; I washed up myself with cold water from a garden hose and it was most refreshing; I almost died of exhaustion or sun stroke by the time I finished the rear suspension and put away the tools

The next day was forecast to be a 80s day but with severe thunderstorm in the afternoon. I planned to start and finish the suspension modifications before the day get too hot and humid. I set out to start bright and early.
after morning coffee and I made myself a bowl of beef soup noodles and off to the battle I went by 7 AM

for home mechanic cardboard is your friend; I especially like the LG TV one for it's slick surface which allow me to slide in and out on my back under the car with ease

the front suspension turned out to be much easier as there is no crawling under the vehicle required; there are ample space in the front wheel wells to swing the wrenches

the stock spring and damper strut

the strut separated from the lower control arm very easily; I tied the end links of the front sway bar to the brake hoses so they don't interfere with the strut assemblies' removal and re-installation

the Koni Yellow and the Swift springs

the factory upper strut mount are in excellent condition; but I would be replacing them with a fixed camber plate that provided circa 2-degrees more of negative camber

keeping track of the order of all the pieces of the strut assembly is extremely important; there are are two washers between the upper spring perch and the under side of the upper strut mount; this one protects the ball bearing from picking up dust and grits

dismantling the factory strut assembly with the impact wrench make it a snap; the factory spring has larger diameter than the Swift spring that I am replacing it; because of this I was extremely worry that the Swift spring would result in softer suspension which isn't what I set out to do; however the Swift spring is progressive and that the spring rate can be higher at the nominal ride height despite the smaller diameter spring coil


again like the rear suspension I elected not to cut down the (yellow) bump stop; the Mini suspension design includes the bump stops to function as springs when the suspension is compressed modestly, unlike a lot of other cars, due to very limited suspension travels

here is the fixed camber plates that I was installing, versus the stock plate (black)

Swift spring (left) versus factory spring (right)

more photos of the double washers between the upper spring perch and the camber plate


I seldom am impressed with aftermarket performance parts, and here is one prime example - the household fasteners that came with the Irish Engineering's fixed camber plate; I reused the factory washer-nuts instead because they are the proper automotive grade

the new Irish Engineering fixed camber plate installed on the passenger side - note that the bearing is more inboard due to the increased negative camber; I still need to come up with a solution to protect the exposed ball bearing and I am leaning towards modifying the factory cover caps; note that the Koni rebound damping can be adjusted easily for the front

In retrospect that I now know the Swift spring only lowers the car a negligible nominal 0.5" with the thicker front strut top mount the IE fixed camber plates increase of about 1.25-degree is almost unnecessary if you goal is to maintain the factory camber. However for spirited or more aggressive track driving more negative camber is desirable. The other reason for the IE fixed camber plates is to prevent the common front strut tower mushrooming of this generation Mini's. Mine has not fallen victim but with firmer suspension the risk is very real.
everything reinstalled and all the fasteners properly torqued

One thing I should mention, I am very happy to be living in the temperate Pacific Northwest when it comes to servicing suspension, brake, and exhaust systems. The vehicles are not exposed to corrosive road salt in winter which make these jobs miserable as well as expensive. The biggest down side here is moss grows on everything, especially rubber seals and crevices.
Before setting the rebound damping of the Koni dampers, I first compare them to the factory counterparts. All my factory dampers appears to be in excellent condition (as are all the suspension and steering joints). I use the factory dampers' compression and rebound characteristics to help me guess my initial rebound settings with the Koni dampers. For rebound I compare to the Koni's set to full soft.
The factory rear dampers have what I consider some of the strongest in both compression and rebound. The firmness of compression stood out in my impression. The rebound is also quite firm. This explains for my friend's Mini Cooper S that has H&R springs with factory shock that actually performs very well. I would say the Koni is about 30% firmer in compression, and about the same on rebound. As I increase the rebound damping on the Koni rear damper the firmness rapidly increases and surpasses the factory dampers. I decide to set the Konis' rebound damping to 1/2 turn from full firm. Unfortunately the rebound damping adjustment is done at the top of the damper shaft. Once the rear dampers are installed, they cannot be access without detaching the spring/damper assembly at the top, unless one drill an access hole though the chassis to access inside the car.
The factory front dampers feel soft compared to the rear dampers, in both compression and rebound damping. This is a surprise to me but seems to be consistent with the Swift springs' spring rates. The spring rate for the front coils are lower than that for the rear coils. The Koni front damper is about 40% firmer than the factory in compression, and about 50% firmer than the factory in rebound. The rebound adjustment range is 2 1/2 turns. I decided to set the rebound to 1 turn from full firm.
For both the front and the rear Koni dampers I also performed push/pull manual tests after deciding on the rebound firmness setting.
The Mini has very little nominal suspension travel. Unlike most cars the bump stops are act as supplemental springs of the suspension. Because of the very modest expected ride height drop (of only about 3/4") I decided not to trim the bump stops. That decision would turn out to be wise.
Swift springs' spring rates with 280 lb/in for front and 308 lb/in for rear
What I generally found with after market performance springs is there are a lot of poorly design products. Most offers excessive drop cater to those wanting to "slam" the suspension. As I read about the development behind the Spec-R springs for the R53 Mini Cooper S I believe the company did perform true design development. I like the modest ride height reduction as I think is sensible given the vehicle relatively short suspension travels.
Swift's product information of their Spec-R springs

the Mini's ride height is now only about 1/2" to 3/4" lower - precisely as Swift publish specs; I am quite content as I did not set out to "slam" the suspension on the Mini; I wanted a sensible suspension modification for performance instead for appearance

I have mentioned in an earlier post of this series. the acquisition of the Porsche GT4 prompted my wanting to improve performance of the Mini. While in stock trim, the suspension and corner handling of the Mini is quite good compared to a lot of cars, driving the GT4 made me realize it is possible to have excellent handling while keeping the vehicle very livable for daily in town driving. Compared to the GT4, the Mini was a bit floaty and felt cheap going over street car and train track crossings. It also has more lean than I prefer.
Before deciding on the Koni Yellow dampers and Swift springs, I was all prepared to invest as much as $3000 for a set of K&W Clubsport coilovers. I read countless forum threads on suspension modifications for the R53 Mini and I would eventually become very aware of the risk and over-promises of a lot of aftermarket coilovers. I would not have anticipated that the not so glamorous and low key springs and dampers to end up being my final decision.
I was all ready to folk over the money for a set of KW Clubsport coilovers

with the suspension modifications I have gone Mini mania and head over heels in love with my handsome R53 Mini Cooper S

The proof of the pudding is on how well the car handles with the new suspension. Despite of the new front camber plates and the adjustable rear camber arms there is no ill signs of alignment problems. The car track straight as before and no speed related shakes, pull, or vibrations. I would eventually go get a full alignment once I decide on the appropriate parameters. Going over streetcar and train track crossings at speed the car now is very composed, very similar to the impressions that I get with the Porsche GT4. No more are the bouncy. floaty, and sloppy cheap car ride sensation. Much better ride quality without being excessively harsh. If there is something that I could consider is to ease the rear dampers' rebound damping a half turn.
The steering feedback more immediate even though I didn't replace the lower control arm bushing with polyurethane ones. I considered polyurethane bushings for the front control arm (there is only one per side) but want to hold off until I am convince they are needed. I read that polyurethane bushings required frequent lubrication to keep the squeaks in check. The turn-ins are now quicker as well as transient responses.
I went for a spirited drive on a nearby twisty road in late afternoon when there was very little traffic. With the thought that my chosen big rear sway bar can induce excessive oversteer in the back of my mind I proceeded carefully. I read too many stories of others got into bad crashes after performing major modifications. I was not disappointed with the vast handling improvements. In no time once I got used to the feel of the difference of the car's handling I felt extremely at ease with its new characteristics.
The Mini drove like a completely different car, all in the good ways. The car is very composed being driven hard in windy roads. There is very little lean and feels very neutral for a FWD car. One of my biggest struggle is to decide on the diameter of the rear sway bar. They are available in 18mm, 20mm, and 22mm. Some has three firmness settings. In the end I decided to purchase a 22mm, but immediately I had buyer's regret. I became very worry such a big rear sway bar will cause excessive tendency to oversteer. So far with the spirited test drive that has not proven to be the case. The car feels very neutral while it wants to plow forward before when pushed hard into a bend.
In all, the improvements in the handling and ride of this combination (there are very large permutation of combinations) far exceed my expectations. Right now I am suffering from Mini mania as I madly in love with this little car. I think BMW has done an incredible job for a retro-inspired car with the first try. Very few cars are so right in so many ways, from the styling, to performance, to reliability, and most important, the joy of driving.
To summarize the suspension modification consists of:
- Koni Sport (Yellow) dampers
- Swift Sport-R springs
- Alta 22 mm rear sway bar
- Hotchkis adjustable rear lower camber arms
- Irish Engineering fixed front camber plates
the ride height reduction is only about 0.5 inch so there is no perceptible difference in appearance; my Mini does not have the fill-the-wheel-well look a lot of owners want because of the relatively rare 16" wheels that I prefer over the more common 17"-wheel option

Unfortunately for the MINI brand, each successive generations after the first generation, they are progressively worst in almost every aspect except the engine horsepower and torque. The most egregious is the size gets more bloated on each facelift. The current (third) generation's front end resemble that of the Ford Transit.
classic mini Cooper S

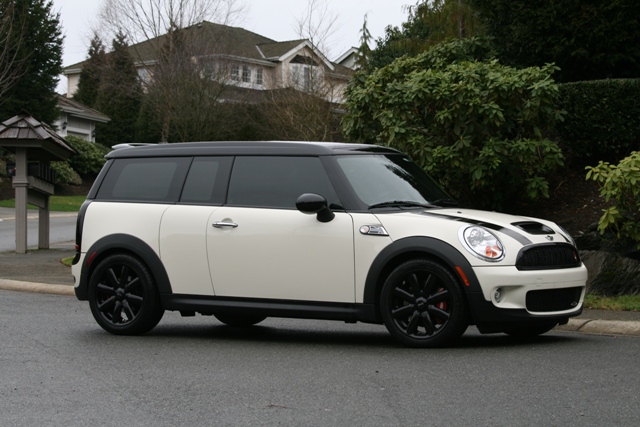
first generation (R53) new Mini Cooper S; to me BMW had done an excellent job of maintaining the lineage, and most important the spirits, of the classic Mini
second generation (R56) new MINI Cooper S; not too bad compared to the first generation but is bigger (even the turn signal light assemblies below A-pillar) and not so handsome

the very bloated third generation (F56) new

is this a Ford Transit or forth generation
I have no idea nor I care to find out which generation this one is - but I would let you be the judge
The MINI brand is all capital for the word MINI. I always made a point to refer the R53 as Mini. My logic is the Classic MINI to me is mini, denoting its original miniature dimensions and weight. The first generation new MINI I use a capital M to denote it's increased dimensions and weight over the original classic mini. For the 2nd generation MINI, I refer them as MINI for its bloated dimensions and weight. So what do I do with the very bloated 3rd generation MINI? I regard it as maxi. You see, there is still room for more bloat to get to MAXI.
classic mini - all lower case denoting miniature
1st gen modern Mini - M is capitalized denotes modern safety and comfort
2nd gen modern MINI - all capitalized MINI denotes first bloated dimensions
3rd gen modern maxi - so bloated that should be renamed maxi (remember the Austin Maxi?)
4th gen modern Maxi - M is capitalized denotes ever bloating of successive generations
5th gen modern MAXI - need me say more?
I like to make fun on the MINI brand. I do sympathize that as a business it have to try to grow. It has to expand the appeals to wider audience and in the world's greatest market people want large cars, and all wheel drive, creature comfort, bells and whistles are popular.
The long poles in the tent parts for the drivetrain just about all arrived. The forecast for the next few day looks extremely good. I plan to begin the work on the engine and drivetrain this weekend. The replacement for the damaged clutch release bearing just arrived and so is the BR35 bearing that was the wrong part for the installation of the limited slip differential. One thing that I would be unable to do is to press in the two conical bearings onto the LSD.

No comments:
Post a Comment