
Nothing is easy when it comes to making modifications to or maintaining the Mini. Everything is tightly packaged. I thought installing a boost gauge and a oil pressure gauge would be a walk in the park.
I have to command this guy's effort in his installation of old fashion Smith analog gauges. Smith analog gauges are great additions to classic Mini Coopers.
I was very apprehensive as how the Smith gauges would look in the modern Mini, unless your car has the fake chrome trim rings for the gauges
well, the guy spared no effort; he found the factory tachometer with the optional chrome trim ring

As to my humble effort I made some small progress and found out a thing or two about the challenges. As I already have a Auto Meter gauge pod I wanted to use it instead of buying expensive Mini specific gauge pods.


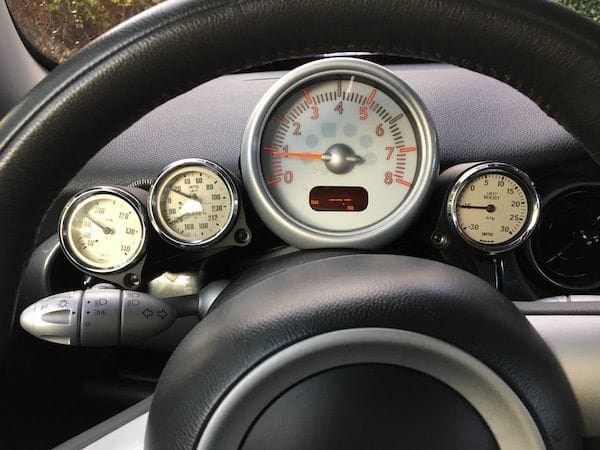
Mini actually offered a factory dual gauge kit at one time which has a gauge pod that fits nicely onto the steering column. I don't know the price but I would assume as all things Mini/BMW it has a stratospheric price tag. Additionally the gauges are gaudy compared to Smith and Auto Meter that has the classic analog look. There are more wrong with this pricey boutique gauge kit. Next to the boost gauge, the logical gauge is none other oil pressure. Why they hell would one want a volt gauge except it is the easiest thing for Mini to do and most profitable - save a oil pressure sender, a tee adapter, the wire harness running to the existing oil pressure switch.
the Mini factory gauge kit

It has been my idea to make my own gauge pod mount for a boost gauge and an oil pressure gauge back in 2005, but other things in life have kept me from this small project until now.
this is one homemade gauge pods using the Auto Meter metal pods

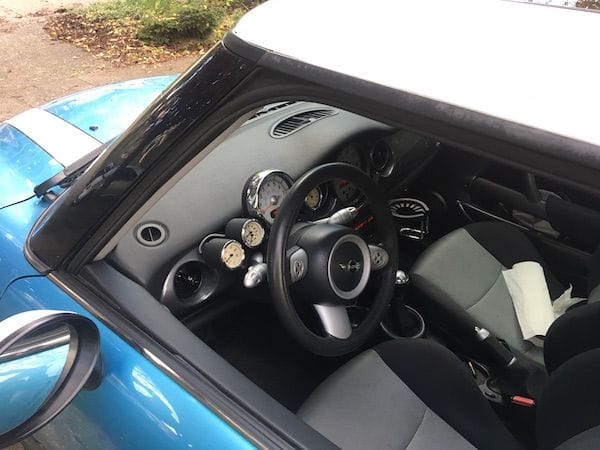
For my small effort I and relative small budget I want a clean installation without sacrifice the steering wheel height adjustment.

I remember the area around the factory oil pressure switch is very confined because of the close proximity to the exhaust header and heat shields. I went and look for a photo to assess the space constraints in adding a tee adapter. There is hardly any room there for adding a oil pressure sender onto a tee adapter. The side branch on the tee has to be orientated just right. This is one reason that some owner has chosen to mount the oil pressure sender remotely by using a flexible hose. In my situation I opt for an analog oil pressure gauge which will hopefully simplify the tap at the engine as long as I can connect the small plumbing fittings to the tee and provide secure routine for the 1/8" nylon line.

I started exploring the factory tachometer mounting arrangement onto the steering column. My goal is to come up with a way to utilize the Auto Meter steel gauge cups with a homemade sheet aluminum bracket for which the gauge cups will be mounted to.

there is very little space here and one have to comprehend the articulation of the steering wheel height adjustment

There are two ways to secure the sheet metal gauge mounting bracket; 1) utilize the two screws at the back of the tachometer, or 2) utilize the two screws at secure the tachometer the steering column. The latter method provides for the most secure support, but one have to content with the thin plastic base trim.

mockup of the gauge position

I am doing what thousands of other designers has done before me; trying to figure out how to create a dual gauge pods given the constraints

The challenge of the base mount method is how to coexist with the thin plastic base trim. You cannot use the trim piece to support the additional gauges so the problem is any sheet metal bracket that you fabricate to utilize the two base mounting fasteners will no coexist with the thin plastic base trim.

more things to think about. How to route the nylon lines and the lighting wires for the analog gauges; they will need to emerge from this rubber dust cover like the tachometer harness


After my assessment I decided it would take too much effort and time to fabricate my gauge pods. I begun to entertain this individual gauge pods by Alta. It is the most affordable one on the market.

I have a few left over fasteners for the stage I Mini modification project. I also notice some subtle rattle noise from the engine bay that I need to investigate. As I wanted to leave access to under the engine bay until I know everything is working from the project I have yet to replace the plastic underside splash guard. I have to put the Mini up on jack stands again to replace the splash guard.
this two screws has no home and my mission is to find where they live

I checked the condition of the stock rubber bushings for the front lower control arms


with a bit of careful looking I found out where the two screws belong; this hole is so big that gave me the wrong impression that a bolt goes there but in fact not

the two screws secure two pieces of plastic part together at each corners under the front end

it turns out the subtle rattle was caused by two of these bolts with very long threadless section; because of this the bolts left the wheelwell liner and the plastic front bumper cover loosely fastened together; I replaced them with my own metric bolts that are shorter

more photos of the rubber bushings; I am reluctant to "upgrade" to polyurethane ones as some people reported they tend to make noise when the lubricate drys up or migrated


While I have the Mini up in the air I begun to entertain the thought of diving in head first with the exhaust system modification to get a little more engine note, but without making it annoying to drive on long trips. The modification that I want to do is called one ball exhaust modification. By eliminate the resonator but leaving the muffler the car has a slightly more pronounced exhaust sound, but not as loud as most aftermarket catback exhaust system.
this is the two bend pipe that I bought - thanks to this owner who discovered it

the first thing I did was to carefully examine the exhaust system especially the mounting hangers to see if the modification that I plan can be done without a lot of pain; there are difference of the Gen 1 Minis depends on the built day range

On my facelift Mini there are many improvements to the muffler hangers so my planned removal of the resonator on one side will not cause the muffler to be poorly supported. I decided to proceed dropping the entire exhaust system from after the catalytic converter.
this remember my high school days crawling under a car fighting rusted muffler and exhaust pipe that suffer from road salt corrosion


with the help of pneumatic ratchet wrench the removal of the exhaust was quite easy except for the weight

I did suffer from a superficial cut

I would soon realize these two pipes are mirror image and one is more suited to the job I planned for it


it is just like the high school days crawling under the car replacing muffler

my plan is to trace out a template of the exhaust system onto this cardboard so I can cut and reassemble the muffler back to the exhaust pipe and maintain their relative positions

the double bent pipe will replace the run to the resonator to the far side in the photo

It is extremely easy to make mistake as to the cut lines are so I measured and checked many times, only to proceed until I am sure

cutting the short pipe is easy

the metal cutting saw save a lot of time and ensure a square cut

the mufflers appears to be levitating but they are supported carefully

the last cut I have to pull out my Super Sawzall with a brand new metal blade

this is the muffler to be retained

I used the cardboard as a template to return the muffler to the right position with respect to the exhaust pipe

With the exhaust pipes cut to measure the next step is to go to a muffler shop and have two pipe ends sweged to the required diameters to join the other pipe ends. It is too late of the day so it has to wait till the next day.
With the muffler out I entertained the thought of installing a short shifter. Short shifter is a popular modification on Mini Coopers to reduce the gear shift throw distances. As most things in engineering there are trade offs. The reduction in gear shift throw distances comes increase of shifting effort. I decided against it as I rationalize that shorter throw does not translate to faster shifting. I have driven a Mini set up with a rather extreme short shifter, and I did not like the effort that required.
I decided against messing with the gear shifter by installing a short shifter kit

Back to the gauge pods. I decided to purchase two Alta adjustable gauge pods as fashioning my own proves to be too difficult. The nice thing about buying Alta is they are local and they give me a discount for walking purchase.
I drove to Alta in Hillsboro to pick up the gauge pods


I immediate test out the gauge fit; it utilize a piece of silicone hose as spacer to keep the 52mm gauge in the pod

I think the use of silicone hose as spacer is a tough of genius


it is a nice gesture for them to include a bunch of gauge installation hardware including wires and crimp splice connectors

My only complaint with the kit is the stainless screw diameter is too big compared to that of the tachometer. I would not want to use it for the fear it will split the plastic screw boss inside the tachometer.

I looked for a small diameter screw from my assortment

Alta gauge pod screw (left) stock screw of the tachometer (right)


I am waiting the arrival of a Auto Meter mechanical oil pressure gauge from Amazon


I will cut the mounting studs of the gauges once I decide to commit to use the Alta gauge pods


it includes a tastefully designed brand logo

No comments:
Post a Comment