This post resumes from a previous post of the temperature controlled ventilation fan for Isolde. As always a simple project in conception turns out to be much more involving. After proving out the the concept, it is time to perform the full installation. There is inevitable feature creep as I think though the complete system. I want it to be as easy and intuitive to use as possible, while complete it in an unobtrusive appearance.
Today, I realized May 1st is just around the corner. I hoisted the carp streamer.
Some of the design challenges that had not been addressed are:
- Properly fusing the entire circuit. The fuse must be small and ideally fit inside the enclosure.
- Finding a compact enclosure. The enclosure must be small enough to fit in the Westfalia's balcony just behind the driver seat. It must have provision for the digital display, and the access to the board to set the desired variables.
- A provision to switch off the fan as well as the temperature controller when the skylight is closed and the fan operation is not desired.
First, I set out to find an enclosure. I scrounged the house for a small plastic enclosure, I narrowed down to three.
- An ugly all transparent plastic jewel box.
- A plastic box for bicycle tire repair kit.
- A plastic box that shipped with the iPhone earbuds.
The iPhone earbud box is the most attractive, but from the construction, I may not be able to hollow out the built in features for snug fit of the earbuds that is built into the base.
enclosure for iPhone earbuds
the size is just about perfect
I examine the construction closely. After a while I was quite sure it is made by gluing two pieces together. I set out to find out with the Dremel tool with the cutting disc. Cutting plastic can be tricky and the friction caused a lot of vibration as well as heat.
just as I expected, it is formed by gluing two pieces together
next is to clean out the uneven features inside
the highest feature of the board is at the relay, and the height is just a few millimeters less than the inner height of the enclosure
there is only may be 2mm of clearance between the relay and the clear plastic cover
i use 3M VHB tape to secure the temperature controller board to the enclosure base
the back side
as I would not need to change the programming parameters too often, I would not make provision to provide access the three push buttons without opening the case
here are the three enclosure candidates
before tackling the wiring I test fit the enclosure to the intended mounting location
the iPhone earbud case just barely fit
I think this is the ideal
My idea is to utilize the skylight open and close position to trigger the switch. This can be done either with the use of a microswitch, or a reed switch. Both has their strong points and weaknesses. I prefer microswitch over reed switch for reliability. However mounting a microswitch requires more precision. I also want to use something I already have on hand. I actually have both.
I leaned towards reed switch very quickly because it can be done without a lot of mechanical precision - as long as the magnet is strong enough. I need a normally closed reed switch.
it turned out my reed switch is normally open, except the reed relay that I have; I would just use the reed switch inside the relay and ignore the relay coil
the problem with extracting these PTC fuse is, they tend to disintegrate from the soldering iron heat; I just apply more heat and tried to square up the top and bottom the best I could
i managed to tacked in the PTC fuse inside the case and wired it to the ground side as it is easier
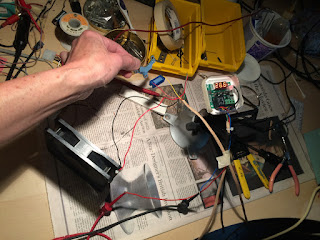
all wired up on the controller side and ready for bench testing
i used a piece of rare earth magnet from a harddisk drive and it can open the normally closed reed switch from a distance up to 1.5 inch; note the 4-conductor telephone wire I use in order to provide for the reed relay switch function at the skylight
The rough plan is to embed the reed relay on the foam board and secure it with epoxy. The magnet would be attached to the clear part of the skylight with silicone caulking for easy and clean removal.
Update:
It turned out all my reed relays that are normally closed are bad. I did not want to go and order parts from the web. I just want to use what I have on hand. I scrounged and found one miniature microswitch that has a short spring steel lever. Because the switch is small, and the lever is very short, mounting it to switch reliably switches on and off with the open and closure of the skylight required a lot of mechanical precision. Now the power to the temperature controller is switched off by the microswitch whenever the skylight is closed. When the skylight is open, the fan will only run when the ambient temperature is above the set point programmed.
the skylight open and the display is visible
the skylight closed and the display off as the temperature controller is also switched off


No comments:
Post a Comment