
I set out to install a set of coilovers, rear swaybar, misc suspension parts, a limited slip differential, and a 15% reduction pulley for the supercharger. On the back of an envelope quick tally is $3000, $250, $650, $1250, $300, plus $2000 labor, making a rough total of $7450. Not too far off from my initial very rough notion of $6000. These were the projected costs. The actual cost turned out significantly lower.
As I researched the coilovers, I would eventually decided against them and opted for a set of Swift springs and Koni Sport dampers. I then shopped aggressively to find the lowest prices of the major items. Lastly I would decided to carry out the work myself. I created a spreadsheet to track all the parts as well as tools I spent on the actually project. I just rolled up the entire project cost. It came to an amazingly low total of just $3486.24. This is just slightly more than my initial choice of a set of KW Clubsport coilovers alone.

This figure includes all the fluids and transmission case casket sealant, and a single mass flywheel clutch kit! One would incline to think I much pinch pennies and compromised on the choice of performance parts, but I didn't. In retrospect that how balanced the modifications turned out I would not change one single of the part choice. Especially the suspension, I would not imagine it is possible to make a front wheel drive car to handle so neutral. So for with very spirited driving I have yet to find the rear end breaking loose uncontrollably. The car no longer have the very strong understeering tendency which all car makers set for their FWD cars to make them safe for all levels of drivers.
I was quite apprehensive of how the Exedy single mass flywheel clutch kit would turn out. There are very little report of others' experience with them. One very reputable Mini specialist had numerous times warned people of buying it as one of his employee has one and found the foot paddle effort to be very heavy. This turns out to be untrue now my first hand experience. In fact the paddle effort is slightly lighter than the stock clutch, which I consider very light. The single mass flywheel to me provides more feedback and the clutch engagement point is sharper. The flywheel is 18.5 pound which is about 33% lighten than stock. It is not too light which would force you to keep the engine RPM high and slip the clutch to launch the car. While it has light food paddle the clutch is by no mean weak. It grabs more readily than the stock clutch ever had. Actually right after taking out the car for test drive, I was so happy with the entire setup that I completely forget to bed in the clutch friction linings gently for a few hundred miles.
The single mass and lighter flywheel does barely increases the drivetrain vibration but only because I know how cushioned it was before. The most noticeable effect of the new flywheel/clutch is the gearbox gear backlash is quite noticeable at low steady speed when you increase and decrease the throttle. Have the damping springs on the clutch friction disc are not as strong this backlash would be less noticeable. I however prefer the strong springs and they are much less prong to fail from load.
I considered installing polyurethane bushings for the front lower control arm, but as there is no saving of labor I decide to wait and see if they are needed. With my suspension modifications which consist of front camber plates, new springs and dampers, bigger rear sway bar, and a set of adjustable lower camber arms, the steering and front end of the car feel very precise and tight even without the help of the poly bushings for the front lower control arm. I attributable this to all the high performance suspension parts that I installed. While the front lower control arms still have a set of original rubber bushings the front end and steering manage to state very tight. This is because on the Mini the front lower control arms only has one rubber bushing each unlike a lot of cars that has two. For now I am quite happy with the rubber bushings, but I may change my mind once I try the Mini on track.
the day after - washing the black grease off the power tools that served me so well

the Mini I could have used this Supersize Me giant sun shade during the performance upgrade project

these sesame shrimps - I ate 1 1/2 pound in one setting as they spoils very fast

testing which is better; the black one to the right is $10 more; these and the Mini fun does not mix

Driving the Mini now gives me more smiles per mile than anything else. I cannot help with uncontrollable outburst of laughter when executing a high speed but safe cornering maneuver.
the Mini was pushed so fast through the big sweeper that it went on controlled 4-wheel drift; there was no panic drama as it was so flat and neutral like a go kart though I wish there was more tire adhesion

Compared to the Porsche GT4 the Mini now is no less fun to drive on the roads or on tracks. It now has the refined ride quality of the Porsche which encouraged me on the quest of this project. The car now drive like a completely different car, all in the good ways. Describing it as very go kart like probably sums it up best. It is very easy to drive fast on winding roads with little drama. If there is something that I might change is to soften the rebound firmness of the rear dampers by 1/4 to 1/2 turn.

of the hundreds of parking spots at Ikea this is my favorite to have near-zero chance of getting door or shopping cart dings; I also like to drive out through the pedestrian walkway left of the car which is like the width of the Autobahn as far as the Mini is concerned

while at Ikea I snapped up 4 of these nice brackets (the biggest one in the center) for just $1.99 each - not knowing what I would use them for


an ideal parking spot - only for one car so very small chance a bad driver bumping into you when they try to perform touch to feel parallel parking


The Swift springs are supposed to be stiffer than stock so I tried to reconcile this seeming inconsistency. The answer must lie in the progressive spring rate design of the Swift spring. I know from the ride and handling of the car the Mini's suspension is significantly stiffer than before.
this is the front strut with the Swift spring with the suspension fully extended

here you can see better the few upper spring coils that are designed to collapsed together with the vehicle at nominal ride height

Here is when the front strut with the wheel on the ground; only the last 2 coils have active suspension function - in conjunction with the bump stop. So the top few tightly packed coils are there to take up space to be compatible with the stock damper as well as aftermarket ones like Koni and Bilstein. The Swift springs are the only aftermarket springs I am aware that takes this approach. I have written that they are progressive spring rate, but I now think I am wrong. I now believe they are linear spring rate, but just has the unusual coil winding design where the tightly packed top coils (turns) are intended to take up the space when the springs are weighted down by by the car.
On my Mini without the all glass skylight the ride height drop is only about 0.5" to 3/4" inch. I have noticed that the ride height is perceptibly lowered by another 1/4" after a week or so with respect to when the springs are first installed. For a lot of folks the modest drop could be a major disappointment, especially if they have 16" (not too many owners do). For me I am actually very glad that Swift does not cater to those more interested in the appearance and offer substantial performance instead of fashion. While a set of very good coilovers give you the latitude to customize the ride height and perform corner balancing, but does that matter for most owners? If I ended up tracking my Mini a lot, I may eventually invest in one of the best coilovers. I am very skeptical of coilovers at the price points of circa $1000 or less.
very little suspension travel (only may be two coils) - that is the spirit of the classic Mini Cooper that made it legendary handling little car

additionally how many cars out there that has zero overhang both front and back? think minimal polar moments; a bloody proper sportscar

another of my favorite big sweepers when the traffic is light

I have been giving more thought to the air intake filtration. Right now I actually like the rather unassuming sound of the intake when the supercharge is boosting hard with the engine in high RPM. I don't even mind the all stock exhaust muffler system but I am open to sportier sound from the intake and the exhaust. One thing that I cannot stand is exhaust droning at highway speeds.
Initially I was planning to get one of this K&N RU-1460 cylindrical filter element and install it into the factory air filter box with a modified home plumbing part. I then thought it would be nice if there is a good aftermarket filter element that is like the rectangular stock disposable paper filter element.

ITG foam filter for the Mini


I then found out that K&N already makes a drop-in filter element for the R53 Mini. This is the one I plan to get, which completely eliminates the need to try to modify the stock intake air filter to fit a cylindrical filter.
K&N 33-2270 drop-in filter for R53 Mini

I did some rough calculations compare the filter surface areas between the cylinder type and the rectangle drop-in filter. The cylindrical RU-1460 is one a lot of people use that fits into the confine of the Mini air box. It has a 10-degree bend. As I suspected, the drop-in filter has more surface area than the cylindrical filter with 10-degree bend. They are 60 sq inches versus 48 sq inches. The specified oiling amount also supports the difference in the areas. They are 1 oz versus 0.55 oz. For now I am leaning towards choosing the rectangle drop-in filter. It has the benefit of secure fit. If one goes the common K&N universal filter, one would have to cut out the foam rubber outer lip to reuse it to seal the filter air box, which requires you to keep some paper filter material to hold the improvised rectangle gasket in shape.
RU-1460 dimensions

33-2270 drop-in filter dimensions


While the brakes on the Min is very adequate for daily street use, I am entertaining a set of performance front brake kit for better track performance. Wilwood offer two main different kits for the Mini. One with 12.2" diameter disc rotors and one with 12.88" disc rotors. The calipers for the smaller diameter disc is 4 pistons while that for the larger diameter disc have 6 pistons. The 6-piston caliper brake kit appears to be a bit higher spec. However with my 16" stock X-lite wheels and SSR light weight wheel I am confined to the smaller brake kit. Even with the smaller brake kit, I have to carefully check the dimensions of my both sets of wheels.
When I was configuring the Mini back in 2004 I spent a lot of time choosing which stock wheel option to get. For Mini Cooper S, there were choices of 16" or 17" wheels. I looked for the cleanest appearance and the lightest. While to achieve the same tire diameter one can have lower profile tires with 17" rims compared to 16". I decided then 16" rims is a better choice for lower unsprung weight. I chose the X-lite which weights in at 17.6 lb. Surprisingly a lot of owners evidently chose the 17" S-spoke which weights in at a whopping 25 lb.
the 15" steel wheel is the lightest but only for Cooper

X-lite is the lightest of all 16" wheels and is one of the best styled

the 17" heavywights

I went and measure the stock disc rotor diameter as well as construction as a baseline for deciding if I want to invest in a set of "big brake kit" for the front wheels; the stock front rotors are 10 7/8" diameter

the stock rear rotors are 10" diameter

the front rotors are 7/8" thick - quite thick as well as are vented

the rear rotors are only 3/8" thick and are not vented

the red calipers have a $100 upcharge, and so are the drilled and slotted rotors

this would be the plain Jane black kit that I would likely get that is no less as good

I bought a set of 16" SSR semi-forged wheels back in 2005 which I only use with high performance summer tires. I checked the weight but it has been so long that I forgot. Today while checking the dimensions of both set of wheels for adequate clearance for the Wilwood 12.2" front rotor/brake kit I remember to weight the two sets of wheels (with tires on).
the factory X-lite wheel with 205 50R16 Yokohama all season performance tire - 36.94 pounds

the SSR Type C wheel with 215 45R16 summer extreme performance tire - 32.28 pounds; these very light 16" rims and tires really drive nice on the Mini

As the tires have fair amount of mileage on them, I estimate that they lost about 2.5 pounds of thread compound form their nominal weight of 21 pounds when new. This give the SSR rims 13.78 pounds each, and the X-lite rims 18.44 pounds.
The Falken Azenis tires that are on the SSR wheels are quite worn now. I plan to replace them with the same Azenis but are the current extreme summer performance series that has a extra sticky compound - Azenis RT616K+

Next I tried to measure the required clearance for the Wilwood 12.2" rotor/brake kit.

the smallest inside radius on the SSR wheel is over 7.15"

the smallest inside radius on the X-lite wheel is only 6.82"; quite shy of 6.94" requires by the Wilwood kit

I often need to know what wheel offset is the stock X-lite wheel. I cannot find one single offset number for the range of Mini stock wheel options. I just know they are in a range of 30s to 40s in mm that is considered nominal while the exact offset depends on many factors to stay within the constrains of the body and suspension system.
Measure wheel offset is very difficult without proper measurement setup and with access to the wheel without tire mounted. Hence I can only get a rough measurement using my knowledge that the SSR wheels has 44 mm offset and are the same 6.5 inch width as the X-lite.
using my wood paint stir stick as a straight edge the SSR flange to outer edge of the rim came in at 138 mm

with the same measurement references the X-lite came in at 147 mm

Using the knowledge the SSR has a 44 mm offset, I subtract 44 from 138 which gives me 94 mm dimension that is due to the thickness of the rim and the how wheel width is measured. So the offset for the X-lite is 147 mm minus 94 mm. That results in a offset of 53 mm.
my wood paint stirstick as poor man's straight edge


the 4-point track harnesses clip into the factory seat belt buckles in just minutes


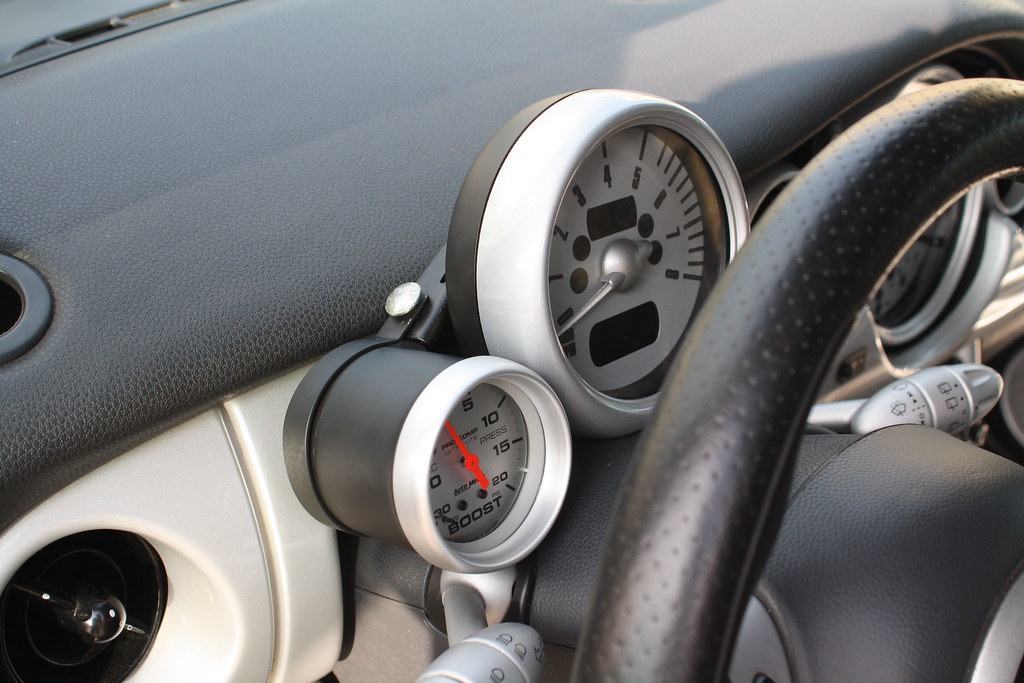
there are a lot of unfinished business left from 2005 that I only get around to entertain finish them; one is installing this boost gauge for the supercharger, and I want to add an oil pressure gauge as well

A few things that I would try very hard to avoid, are to pay inflated prices for the aftermarket gauge pods and the oil pressure sender adapter.


$56 plus shipping for a $0.75 fitting - you kidding me? I budgeted $10 on brass fittings that I can get at home depot, which are likely cheaper than the shipping cost to order from these clowns


I know time is money for most people, but I would rather spend more time than to support vendors that gouge their customers. It is not the bottom line, but the experience in the journey that gets there. It is like a country refuses to pay ransom, no matter the cost.

Right now with the 15% increase of the supercharger RPM there are a few things to consider, but I am taking a conservative approach. Things to be considered is a set of colder spark plugs, a slightly larger set of fuel injectors, and lastly to have the ECU re-mapped. There is 12 years worth of aggregated wisdom on the Mini forums. I will get a set of colder spark plugs, but for the rest, I infer are optional at this time. For track-heavy car the rest seems to be highly recommended.
I have been looking into the challenges of installing 2 gauges into the Mini. I distrust aftermarket gauge senders. For the oil pressure gauge, I am considering a mechanical one instead of an electrical one, partly in consideration to the very confined space of of the factory oil pressure switch sender which I have to tap into with a tee fitting.
I just snapped up an Amazon Warehouse Deal on this Auto Meter Ultra-Lite mechanical oil pressure gauge that matches nicely with the boost pressure gauge that I already have. Next I need to figure out how to mount both of these gauges, without breaking the bank. I am also hopeful that the two 1/8" nylon lines would not impose problem routing them from the engine bay into the gauge mounting location. I will need to take a trip to Home Depot to get some brass fittings soon.
Auto Meter mechanical oil pressure gauge


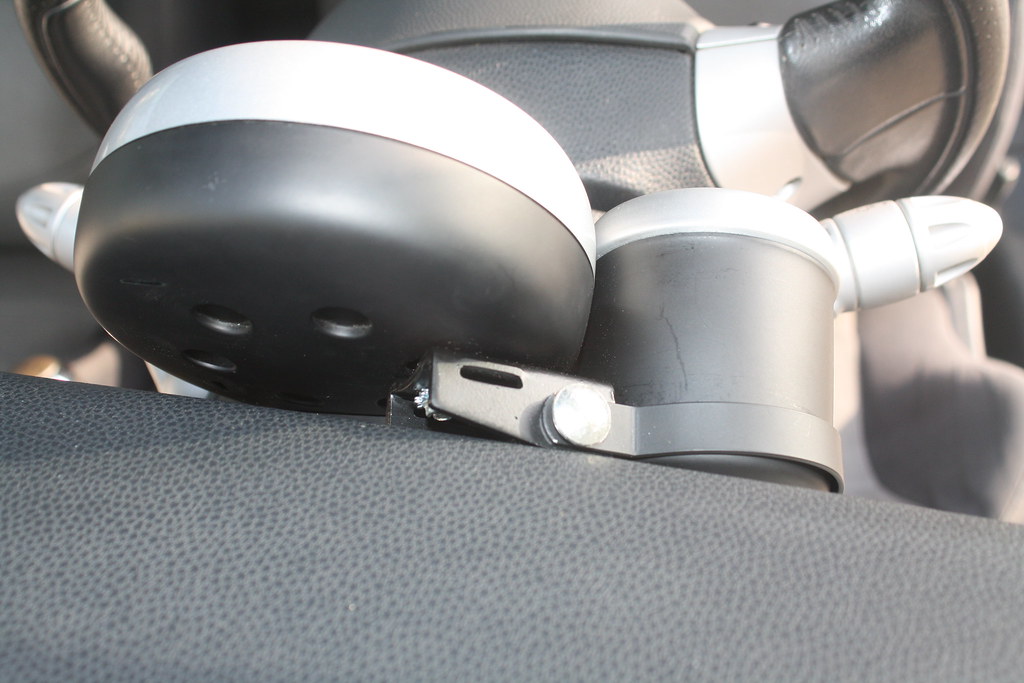
this Alta single gauge mount is the cheapest solution but it is open back design and you have to buy 2; with the depth of the Auto Meter gauges I will be installing the shallow ring will leave 1/3 of the back side of the gauges exposed; I am leaning fabricating my own to work with the metal gauge cups from Auto Meter

it is an open back design that mounts to the back of the tachometer plastic screw receptacles; the problem I see is the pod ring is very shallow compared the rather deep Auto Meter gauges that I plan on installing

Auto Meter metal gauge cup has a substantial metal base

here are a few photos that I found with other people's Auto Meter gauge mounting using the metal gauge cups

here you can see the interference challenges the dashboard - he moved the meter cup fully forward of the ring clamp; Das ist Mini
While his solution works I don't think I want to put so much stress onto the two flimsy plastic screw bosses of the factory tachometer. I will try to fabricate an aluminum bracket using the much stronger base mount of the factory tachometer on the top of the steering column.
I have no disillusion with the challenge. Since the debut of the first generation Mini Cooper S there must have been tens of thousands of attempts to install a gauge on each side of the factory tachometer. While it appears trivial at first glance a elegant solution is more difficult in practice. This is actually one of more early project back in 2005 which I have never got around to do.
How does your new mods compare to a John Cooper works version?
ReplyDeleteRob
Much much less and you would be hard pressed to find a JCW with low miles. JCW has always been a boutique premium. To me it is just a hollow pricy branding on the modern Mini. I actually dislike the painted skirt as well as the front air dam. Case in point, the JCW brakes are still floating caliper design. May be just my sour grapes.
ReplyDelete