
I had tried to be methodical in keeping track of the fasteners during the modification of the Mini. Still in the end I dropped one bolt into the a crevice and ended up having 4 extra bolts. Fortunately I know they are not bolts for anything critical. I have been going through the copious photos that I took in the process hoping to find where they belong.
Two days ago I came to the conclusion two of these bolts were not the right fasteners from the factory. Then I left with 2 bolts that I try to find their home. Today I found that they belong to the radiator support in the modular front end. This should account for all the fasteners. The only thing is I am not about to bother to remove the bumper cover to re-install this two bolts. To do so will require putting the Mini in the air again to remove the bottom splash guard before the bumper cover can be removed to get to the locations of these two bolts.

continue the exhaust system modification; I am continue to be very impressed with the quality and precision of the stock exhaust system

It would turn out that the piece of double bend pipe that I want to use would not fit. The distance between the two bends are too far apart. If I were to go ahead and install it the exhaust pipe will bang around the heat shield at 2 places. The problem is I have already cut the factory long pipe to connect to it as well has had the end swaged. Now I am into this muffler modification project that is more involving than I anticipated. I need to figure out how to salvage the situation without giving up and let the professional mop up my mess.
this factory pipe is now too short and the end has been swaged

the factory muffler and pipes are of very good quality and they are in near new condition

I have to shorten the distance of the two bends on this pipe so time to break out the MIG wire welder

Welding muffler pipes is always a dicey business. They are made of thin gauge mild steel and you can blow through the pipe very easily. I have to change down to 0.023" wire and that mean also changing the metal jacket of the wire feeding welding cord.


the sun is again unrelenting, making the most unpleasant welding experience but I am tough


I had to make one joint with a small angle to increase the bend of the small bend of the pipe. As the factory pipe is now too short, I have to add a circa 5-inch piece to lengthen the straight horizontal segment of this pipe.

When I tried to make the final installation, I would find out that the exhaust pipe tunnel in the Mini is built to such tight tolerance (to maximize the cabin space) there is no room to use a muffler pipe clamp to connect my short piece to the factory straight pipe. The only way to address this is to join them by welding them together - just like the factory exhaust system which is all one big piece. I ended up with three welded joints. There is only one joint that is left that give me the ability to align the muffler to the long pipe segment, as well as to center the tail pipes at their opening of the car. That joint can be made with a 2 1/2" pipe clamp.
the welds are not pretty but do the job; what I notice was the factory pipe take the weld nicely but not the aftermarket pipe; it is possible that I didn't clean off the protective coat of oil film leading to a lot of splatter; though the steel of the factory pipe is definitely harder (less mild)

With just hair width of clearance I managed to get it all installed, but I was still worry the pipe will bang against the heat shield hitting bumps on the road fast. At the closes gaps there are no more than 3/4" of clearance. I am amaze how tight the hangers and supports restrains the exhaust pipes as well as the muffler in the Mini. It is built to such high tolerance.

I remove this hanger for the resonator which is no longer needed. The car is about 18 pound lighter on the passenger side. It would be nice if the weight saving is on the driver side.

Mini is relieved to be back down on solid ground

I went for a test drive which consists of going over rough roads with train track crossing at speed to make sure there is no knocking from the exhaust hitting the heat shields or the body. So far so good. The exhaust is only slightly louder and unless you have experienced before the modification you would not know it is louder. The most noticeable are the louder pops and crackles during deceleration when you release the throttle.
With the 15% supercharger reduction pulley the increase in horsepower is dramatic. As the weather gets warming I notice the engine does not run as swiftly when driven hard. I have a set of colder spark plugs on order and I think it should help a lot as the stock plugs are likely running too hot.
We had a hard and cold winter that I was very worry all my banana plants are killed by the deep freeze. Today I saw this first piece of bud shooting from the ground at the front yard. I went and check the plants in the back yard and that too has a new shoot.

for the boost gauge that I bought 12 years ago I think it is missing a tee-fitting as an rubber reducer piece

if I were to be really cheap I can make this brass fitting that I have work for the tee that I need to install the oil pressure gauge but I broke down and bought a very over-priced adapter due to the tight confine of the oil pressure port location


I called Auto Meter to confirm what should be included in the boost/vacuum gauge. The tech support was very kind and he expedited me the missing tee and brass compressing fittings - no charge. This is a breath of fresh air this day and age that most business are very suspicious if you lie to them to get free parts.

Auto Meter sure won my heart as a very satisfied customer

I ordered this all mechanical oil pressure gauge.

While I have all the parts I need to start the boost gauge installation, I want to bundle the installation with the oil pressure gauge when it arrives. Also since I have to remove the intercooler I want to swap the spark plugs all in one job. There is also the fog light wiring which also to be done at the same time as I would be tapping into the dimmeable instrument lighting for the gauge lighting.
I have given more thought to the big brake kit for the front wheels. Last measurements that I took I neglected to check the clearance for the calipers.

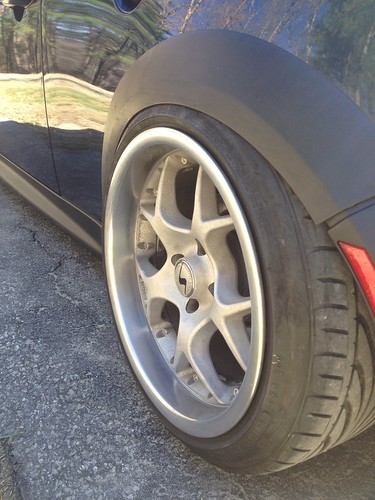
the SSR wheels look to be fine

the stock X-lite wheels violated some dimensions; at best they may work with a set of wheel spacers; I dislike dealing with spacers

I went ahead and ordered a set of plain Jane kit with black calipers and no thrill, no drilled, and no slotted rotors - I hate being a fashion victim and hence my choice

it is a 4-piston caliper design

the Mini could have this flashy brakes if not because I am too cheap and subscribe to form follows function

the kit requires a separate purchase of braided brake line kit with the right angle fittings

This is a long list of modifications for the Mini. So far I am extremely please with my relative conservative choices.
I have this 1/4 turn ball valve hose bibb that has always dripped water and is especially worst when the temperature is low. I remove it thinking it has a defective nylon lining and the entire valve needs to be replaced. As I am curious how it is built I realize there is a hex wrench fitting inside the outlet.

I explore how this ball cock is assembled together

I then realize may be I can tighten the brass seat a little more - similar to how you tighten the packing in a globe valve to just right so water does not leak through the shaft of the hand wheel

you can see the Delrin lining inside

I tighten reassemble the brass seat and tighten it just a hair more and that cured the leak. Fortunately for me I withstood the temptation of buying a new one when I saw them in the hardware store on the other side of town. I also just fixed the cruise control on the Land Rover Discovery. I deserve the title of Mr. Fixall.
I was browsing through a 90+ pages thread of "show us your lowered Mini" and came across this one that amuses me; it looks like someone stole all the wheels off it

lots of slammed Mini's - I just don't get it

One owner said he have it set so low that sometime going over speed bumps he scrap on jack points.
and tire stretching that I just don't get as I've gotten too old
During this Mini modification project I found that I wasted a lot of time not having the right tools for the job. I decided to invest in some tools though I should have done that before the project. For example, I was still using a cobbled together set of 6-point 3/8" metric sockets that I bought a piece by piece during high school. I learnt the hard lesson then never use 12 point sockets for any serious job. I wasted a lot of time looking for the specific size sockets during this project. Nowadays good tools are so affordable and there is no reason to shortchange myself. Another is welding. I had such a hard time performing good welding because I don't have a useable welding helmet. I was welding either without any eye protection, or using a normal sunglasses.
I had bought 2 helmets that were made in USA but they both junk. The current one is too dark to see. Yesterday I went to Harbor Freight and bought a auto-dimming helmet at a fraction of price I paid for the US made helmets.
my first auto-dimming welding helmet - I would spend some time to practice my welding skill that is severely lacking

I went to Sears to find a set of affordable 3/8" six-point socket wrench. My requirement is it must not have skipped size. I didn't want to spend too much so I opted for a set that cost a mere $19.99. It is not a good set as there is no extension in the kit, but I just want to have a set of six point sockets that I don't need to waste time looking for the specific size. At check out the cashier rang up $9.99. Spotting a bargain I went back and bought another set for keeping in one of my cars.
two cheap sets of 6-point socket wrench without skipped size between 10mm and 18mm

I was browsing the Napa Auto Parts store and came across these line of very good quality tire gauges; I have bought a very inaccurate fancy looking inflator with a dial gauge which turned out to be junk; only have I know about this line at Napa - they are made in Taiwan

here is the closeup with the one at 1 o'clock and one at 7 o'clock looks to be excellent ones; there are occasional gems at Napa to be discovered

these Knipex pliers are very tempting addition to my tools collection - I might get the top one with the straight jaws

Update 22.05.2017:
Money was burning a hole in my pocket so I went to Napa to take a closer look at the tire pressure gauges. I asked the staff if I can just take the one with the sliding readout and the one with a dial gauge to test on my Mini in the parking. He said no problem, despite I was walking out the store with $150 worth of merchandise. I rejected the one with the dial gauge as the range is 0-160 PSI, making the reading of passenger cars too coarse to be accurate. I chose the one with the sliding readout is the most expensive as it has a brass body as well as magnified lens for the readout.

When I prepare to put a big dent in my wallet another staff came over to the cashier and instructed him to put in the correct discount code. I was puzzled and soon I would find out. Today is my lucky day. Napa is having a one day tools special day where they give amazing discount on all tools. I soon realize the 16 wheel tractor trailer that just pulled into the parking lot is their tools truck for the occasion. I got a whopping 43% off the purchase. This gauge just feel great in the hand and with the build quality to go with. The air chuck swivels 360-degrees making it very ergonomic to use. The range is 0-120 PSI with a very clear graduations even for passenger cars.
At one point I entertained a foam type aftermarket drop-in filter. At that point I have very little knowledge of their pitfalls. Soon I know it is best to avoid them like a plague, unless it is your cheap disposable lawn mower. Here is a photo of a poorly neglected Mini Cooper S with the foam air filter disintegrated with pieces of foam lodged inside and baked onto the intercooler inner walls. Needless to say, I am sure there are melted foam also in the supercharger.

I had no idea that you can spend $235 on a boost gauge until I read one blog more closely of which Auto Meter boost gauge he was installing. It piqued my interest of his chosen location of the pressure/vacuum sensor, which I found odd as most people gets the mechanical boost/vacuum gauge. It turns out this gauge is a servo motor type gauge those used by most new cars. He also chose a similar $257 oil pressure gauge. His entire 2 gauge set up is over $850 including the gauge pod and the sensor adapter fittings. I do note that being a fancy electronic gauge it has peak hold and max functions. For me my emphasis is as simple as possible and hence I chose all mechanical gauges.


What tires are you rolling on? All that power needs to get to the asphalt.
ReplyDeleteFalken Azenis. Love them. Stiff sidewall and grippy compound. They are quite old so I hope to wear them out soon and replace with their newer stickier compound.
ReplyDeletehttps://www.tirerack.com/tires/tires.jsp?tireMake=Falken&tireModel=Azenis+RT615K%2B