
an omelet cooked to perfection


This is not a project that I have been looking forward to resume until completion. While I have the modular front end off when performing the drivetrain modifications I took the opportunity to install the two front fog lights. The lights were installed and the wiring brought out into the engine bay but still need many man hours of labor intensive work to get the wiring retrofitted to the car. When I ordered the Mini back in 2004, I also purchased this front and rear fog light retrofit kit, as well as a factory anti-thief alarm.

Hella front fog lights

The front fog light kit harness retrofit requires connecting to the fuse terminal box in the engine bay, and into the cabin which it would need to go to two places to be connected to existing connectors of the car.
I removed the engine air intake filtration system so to be able to feed the harness into the cabin

this is the wire loom grommet I would use to bring the harness into the cabin

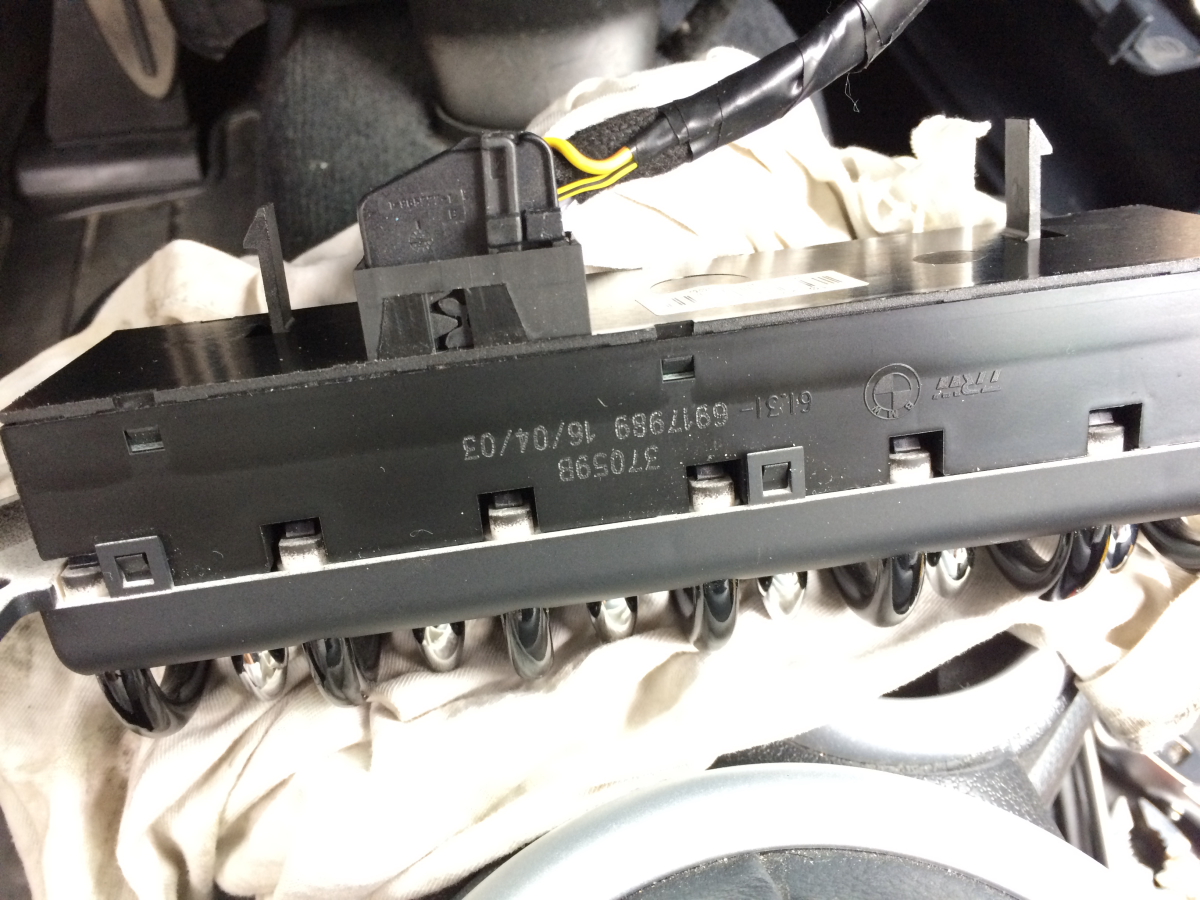
four signals of the harness need to be added to three connectors under this fuse terminal box

it took me a while to figure out how to remove the dust shield without causing damage

I have to say, these connectors under the fuse terminal threw me into a spin. With my extensive electronics experience I was challenged as how to add these additional pins into them. I took a much time as needed to avoid damaging the delicate piece parts of the connectors. Unlike most common connectors with crimped pins which you just insert them into the vacant contact cavity there is more to it. On each side of the connector there is a locking bar that prevent the contact pins from accidentally dislodged. The lock bar must be removed first before a contact pin can be inserted or removed despite they have a barb that lock into the connector.
this is the delicate clips that holds the lock bar in place and you have to gently ply them open to release the lock bar

the lock bars are not the same on all these three connectors - there are two types

the installation instruction is also vague at many steps so I have to be extremely careful that I correctly interpret the intended instructions


in the usual Mini servicing procedure you have to dismantle a lot of stuff to get to what you try to reach; this stock shift knob is 6.6 once - I see no reason to replace it with aftermarket one

One reason I would not let anyone else service the Mini is I would take the time and care to do things right, and without hidden damage and missing parts when done.
you have to ply this control panel out and with my care the thin plastic bezel popped up and with it this delicate seat heating button cover - fortunately no damage was done

there are two screws that fastens the center console to the floor

note the 4 connectors where they would be returned; and yes, I really abused my fingers pulling the interior apart all for Mini love


two more screws fasten the center console to the floor

this plastic pen tray also needs to be removed to gain access of the toggle switch bank

you have to bend this flexible plastic part quite hard to be able to remove it

this is a Mini add-on accessory

the shift knob is removed not by unscrewing, but by pulling it up with some determination and might

a hidden cable tie secures the shift boot to the shift lever

all these steps just so that the two down tubes of the center console can be removed

these two pieces of foams are handed


once the foam spacers are removed the downtubes may be lifted off without scratching the paint finish


the two downtubes hide the two screws that fasten the toggle switch bank to the center console


Mini use these nifty connectors through out the inside of the car; it has a lever that pulls the plug into the receptacle and locks it in place

you can see the plastic gears that pulls the plug into the receptacle


next is to unlock and slide out the contact cartridge so the new contact pins may be added

these are the two new contact pins

I have two versions of the retrofit instruction and one is wrong with incorrect pin numbers given. Fortunately for me I accidentally discovered there are two of these documents with the corrected one being a later release.
this is the correct version

this is the incorrect version


as the wrong pin locations given already have existing pins this further give me confidence which version must be be correct


next stop for the wiring harness is to the general control module in the passenger side foot well which is hidden behind a all inclusive plastic trim piece


the glove box has to be removed too


how the activated carbon filter is secured is very interesting as well as how the surface area is maximized in the design


this is the general module


Before adding the new contact pins to the connectors of the general module I next turn to retrofitting the rear fog light as it also has a harness that needs to be brought here.


all the new contact pins added to two connectors of the general module

While I have so much of the interior dismantled I took the opportunity to vacuum the dust out of the normally inaccessible crevices - they contribute to much of the old car odor; I also wipe down with soap and water

even at near 20 years old my Miele vacuum cleaner is still one of the best and the much over-touted Dyson's cannot hold a candle to it especially when it comes to the engineering excellence of the attachments


only the excellent attachments of the Miele can get to and vacuum many tight places so clean


Before buttoning everything back up I check their operation. I checked also the functions of the audio system and found that I only getting very faint sound out of only the tweeter of the front left channel speaker. I needed to determine where the problem is and take appropriate action so not have to tear open the center console again later.

With systematic debug I eliminated the audio wiring of the center console and have high confidence it lies in the speakers in the door.


I protected the easy to marred parts in plastic bag during this kind of project


The Mini is now all back together with the fog lights retrofitted. They do not function yet as a special software must be used to enable these features by the dealer service. I am under the impression there is a free domain software called NCS Expert that allow one to change BMW cars optional settings and I hope I can use it to do this myself, instead of going to the MINI dealer to get these done.
Mini got a deep interior cleaning and a wash outside too

I added this decals
I decided to jump in trying the NCS Expert with both feet. I ordered this cable, on Amazon but not shipped by Amazon so should get to me very quick to put Mini on a limp.

One last time, I revisit should I replace the stock grills with the Mini black Aero Grill kit.
I just prop the black Aero Grill in front of the stock grill

To me it disrupts the coherence of the all white with chrome ascent simplicity. The black Aero Grills works with most other paint colors but often not well with Pepper White Minis. I have looked at a lot of Pepper White Minis on Google image search. The few that the grills work are cars that have black bonnet strips, and/or black headlight trim rings, black mirror covers, and sometimes more black on the bumper cover.

I think the Mini has always looks great the way it is.


No comments:
Post a Comment