
It is really easy to do the 12-hour to 24-hour clock conversion. Just cut a trace and solder a short to bridge two pads.
xacto knife at the ready

cut a trace and solder a short to bridge two pads

assembling the pieces together is actually much more difficult - here the display is upside down


strangely the two elastomeric connectors sit in there quite slopily; so i centered them the best i can with respect to the PCB contacts

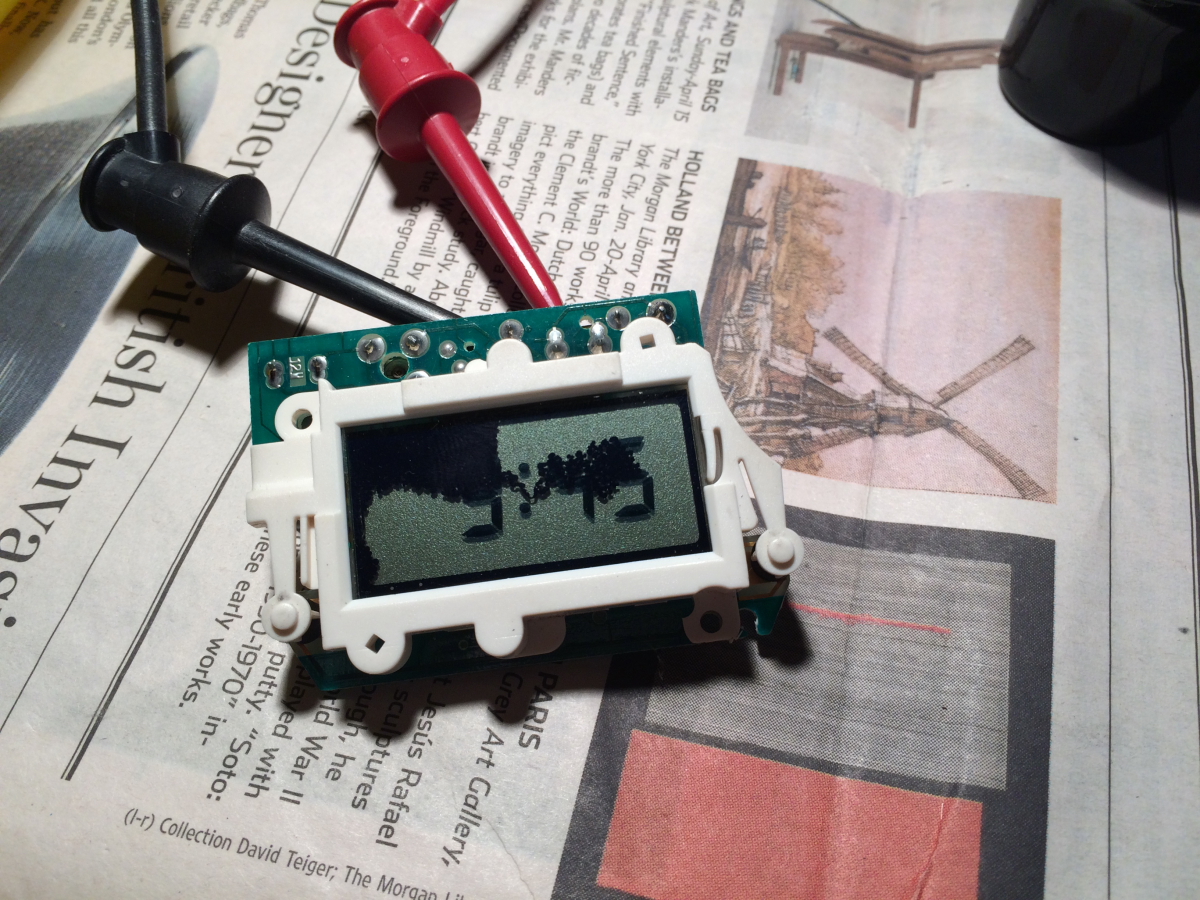
here is 9:45
scroll the hour digits to 15

I realize that I left out the light-pipe which also acts to register the two elastomeric connectors

take it apart again

with the light-pipe assembly in the sheet metal spring help apply pressure to compress the elastomeric connectors against the PCB and the LCD display glass
assembled back together and all is good; 21:46 shown on the display

One of the most bonehead move that I did recently is the installation of the Koni dampers onto Isolde. The reason is I have been trying to sort out some ride harshness which I suspected may due to the new tires, CV joints, wheel bearings, or transmission or final drive bearings. The introduction of the Koni dampers added another set of variables and that complicated the faultfinding.
During the trip of Isolde's recent sea trial I was very troubled by the ride discomforts. Tried that I might in the attempt to get some clue as what might cause it I could not come to a definitive conclusion. There may well be more than one cause. I knew the new Koni dampers has a lot to do with the ride hashness, which very resemble problems cause by rotational components that I listed above. I also suspected that the Koni's can create this shaky symptoms like that too. When I installed the Koni's I set them all to 1/2 turn from the most damped rebound setting. At the time, I have nothing except other people's experience on the forum that I read. Having the Koni's in my hand there is no doubt they have much more compression and rebound damping than the Vanagon OEM counterparts. I knew I most likely have to readjust them after gaining some road test experience.
Yesterday, I readjusted the rear Koni dampers to 1/2 turn from the least damped setting (1/2 turn clockwise from fully counter-clockwise right hand WRT holding the other end of the damper with the left hand). I went for a short drive expecting a big reduction in the harshness. I was disappointed even though much of the shakes seems to origin from the rear suspension before the adjustment. There is some improvement though I cannot be absolutely sure.
i clean off the rust proofing tar off the air-conditioning dryer's sight glass

i took this photo of the oil filter in planning for an oil pressure senser and temperature sender so two analog gauge may be outfitted in the cockpit

we have a sunny day so I improvise the 12V low noise computer fan to cool the cabin parked in the sun; this mockup gives me some idea how well this fan would work

it is just supported by the insect screen


Today I set out to re-adjust the front Koni dampers. Adjusting the front ones are much more difficult and involving than the rear ones due to the more complex front suspension because of the steeling mechanisms.

the Koni dampers for the front is a bit on the short side; it is a dead giveaway the company did not specifically design the set for the Vanagon, but rather just adapt the ones that will do a good enough job and called it a day. I am sure there are many makes and models of other vehicles are in the same boat as the Vanagons. Surprised? Not me.

I didn't install the two nylon spacers last time as I felt that they are too cheesy. Then I thought may be Koni supply them to help prevent the shorter dampers from bottoming out and damaging the adjustment valve inside. I looked frantically but I could not remember where I filed the parts. I decided to check the rubber bumper against the damper. There is plenty of thickness of the bump stop that the damper can never bottom out. I felt at ease not to use the spacer.

note the conical spacer on one side of the bolt hole; popping it out make the removal and installation of the damper much easier

i took the photos of the top and bottom ball joints


The adjustment of the front Koni dampers took about 2 hours. I set the front dampers to 1/2 turn from the most damped rebound setting, just like the rear ones. I went for a test drive right after in the Friday noon traffic which already begin to be quite busy. The harshness is significantly reduced. Compared to the factory dampers the ride is never the same. There is no doubt much more telegraphing of the pavement roughness and every bumps and ridge can be felt. This is to be expected as when comparing the factory dampers to the Koni's by exercising them with ones hands the resistance differences are huge, both in compression and rebound (with rebound set to least damped). I knew very well what I was buying into and this is what I received.
It is worth pointing out that all these road ride tests were performed with a very lightly loaded vehicle. With more laden weight the ride comfort is expected to improved somewhat.
No comments:
Post a Comment