rear view camera
It became apparent once I took procession of the vehicle that a rear view camera is a must. I chose a semi professional unit from rearviewsafety.com. It is more expensive but comes with a better quality camera and no-nonsense commercial quality cable harness long enough to span the great length of the James Cook from the high mounted 3rd stop light to the windscreen.
My rule of any upgrade is to minimized permanent alteration to the vehicle where possible. An aluminum mounting plate was fabricated for the rear camera so no additional holes was required to mount it.

As it turned out the mounting location of the camera is so high it is difficult to aim the camera to cover the traffic while driving and the close quarter for parallel parking. I added a second camera onto the rear license plate for close-quarter parking. The latter is just a low cost camera costs circa $25 from Amazon. Surprisingly it performs above my expectation given such low price.

Routing the cables and finding a location for the multiplexer box took a lot of work and planning.
The final location of the monitor is slightly above the Sprinter's factory rear view mirror. With the rear view camera I can now parallel park in a very tight spot without a spotter.

No camera can come close to the clear visibility of mirror and human eyes when it comes to resolution and dynamic range. The rear view camera, however, is the next best thing for this vehicle.
sound system
Out come the speakers in the cabin. In goes the Alpine SPS-510 5.25" speakers. They just barely fit the mounting constraints of the factory speakers and allow one to reuse the factory grills. I did not want to enlarge the mounting holes for larger diameter speakers.

The factory plain-Jane CD/radio head unit is replaced with an Alpine CDE-133BT. I never cease to be amazed for such low price how nice this head unit is if you have an Apple mobile device. It has seamless interface to my iPhone and iPAD via bluetooth. I had done many aftermarket auto sound systems that cost 5 times as much and this is by far the best head unit hands down. Apple iDevices certainly upend the mobile electronics, making CD changers and OTA radio so yesteryear.

Microphone for hand-free calling, and best yet with Siri voice interface of iOS. Can't wait to get the new Apple map with turn by turn voice guide navigation in iOS 6.

an optional remote control

subwoofer
With only 5.25" speakers the low frequency of the audio system requires some help from a subwoofer. Finding a location to house the subwoofer is a challenge. After a lot of planning the only satisfactory location is behind the driver seat. I would love to have a larger diameter sub and had my eyes set on the Infinity Basslink 10". I considered all possible mounting locations but it is just not in the cards in the vehicle. I settled on the Kenwood KSC-SW10 compact powered subwoofer. It is pricier due to it niche design for small space.
It is definitely not one for impressing your neighborhood teens. It nicely augments the low range due to limited speaker options of the camper.

the wiring is routed through the footwell neatly

i am quite please with the result of the audio installation. there is no visibly wire except a short segment of wires near the subwoofer


i am quite please with the result of the audio installation. there is no visibly wire except a short segment of wires near the subwoofer

iPAD mount
For long trips, I prefer the larger screen of the iPAD over the iPhone using as mobile map, and to look up travel information on the road. I had came up with a custom mounting base on the console using a RAM iPAD mount. RAM is the only manufacturer that make good mounts for mobile devices. I am very happy with the result.

back side

with the iPAD receptacle stowed away

compass
when all electronic navigation aid fails the compass can be useful - the backlight is wired to the instrument light circuit

reinforced LCD TV mounting
I reinforced the cheesy TV mount installed by Airstream. I also realigned the sloppy LCD arm installation made by Airstream so it is true and horizontal. I replaced the straps with these small bungee cords used by photographers. They secure the light weight LCD monitor in transit. The LCD TV doubles as PC monitor for video and photo editing on the road.


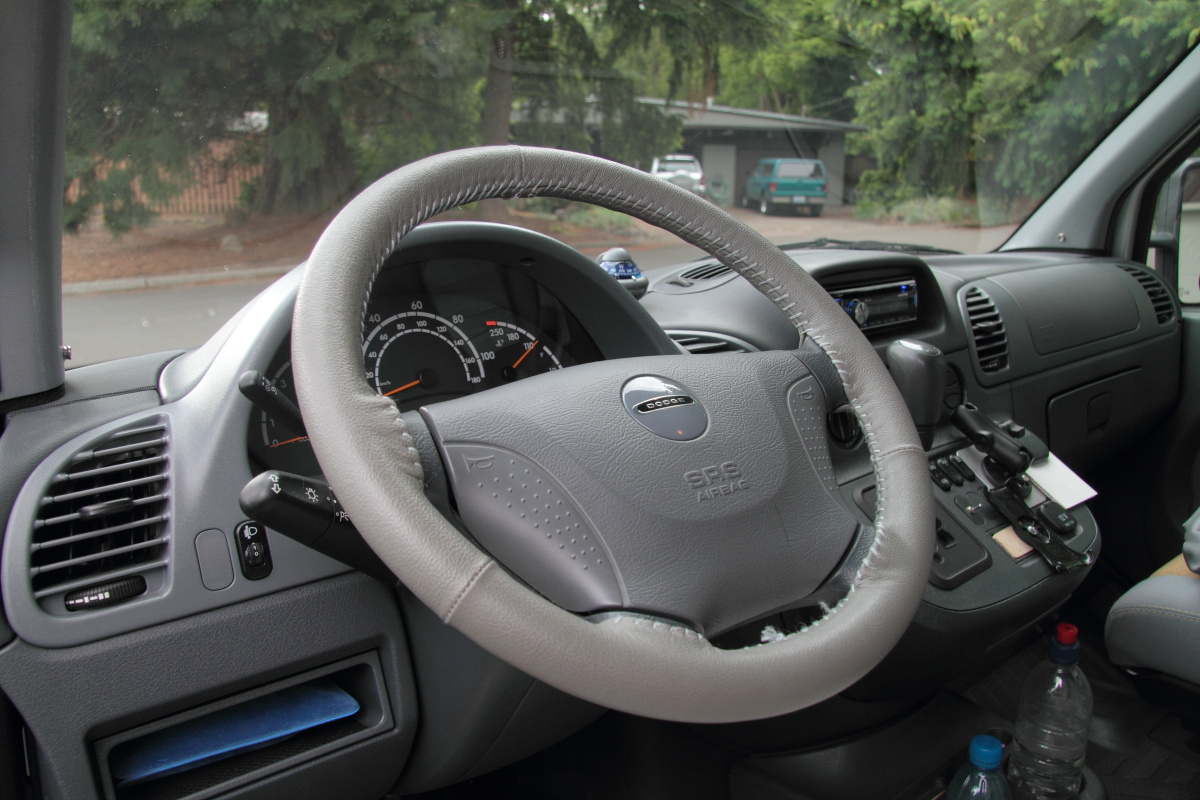
steering wheel cover
Took 3 hours to lace but the result is very satisfactory. A $25 well spent.
home made sun shade
The aftermarket for Sprinter accessories always charge significantly more for Sprinter than other vehicles. I could not find a sunshade for under $100. This homemade one is made with a silvery reflective fabric - cost circa
$15. It greatly reduces the solar gain in sunny days. It takes just seconds
to put up.

AC power cord
I made this short power card to use when I know I would never need to turn on the air conditioning. It is much easier to handle than the full blown RV cable that can handle the power consumption of the coach AC.

it is perfect for charging the batteries with the mini generator

with years of camping in the boomdock i had never ran the battery down to require charging with a generator

hello kitty
The hello kitty on the bathroom knob indicates the door is properly latched when it is upright. It is a delight to young children.

The mini-bungee cord keep the bathroom door secured open. It hides behind the cabinet fascia when not in use.

well equipped kitchen
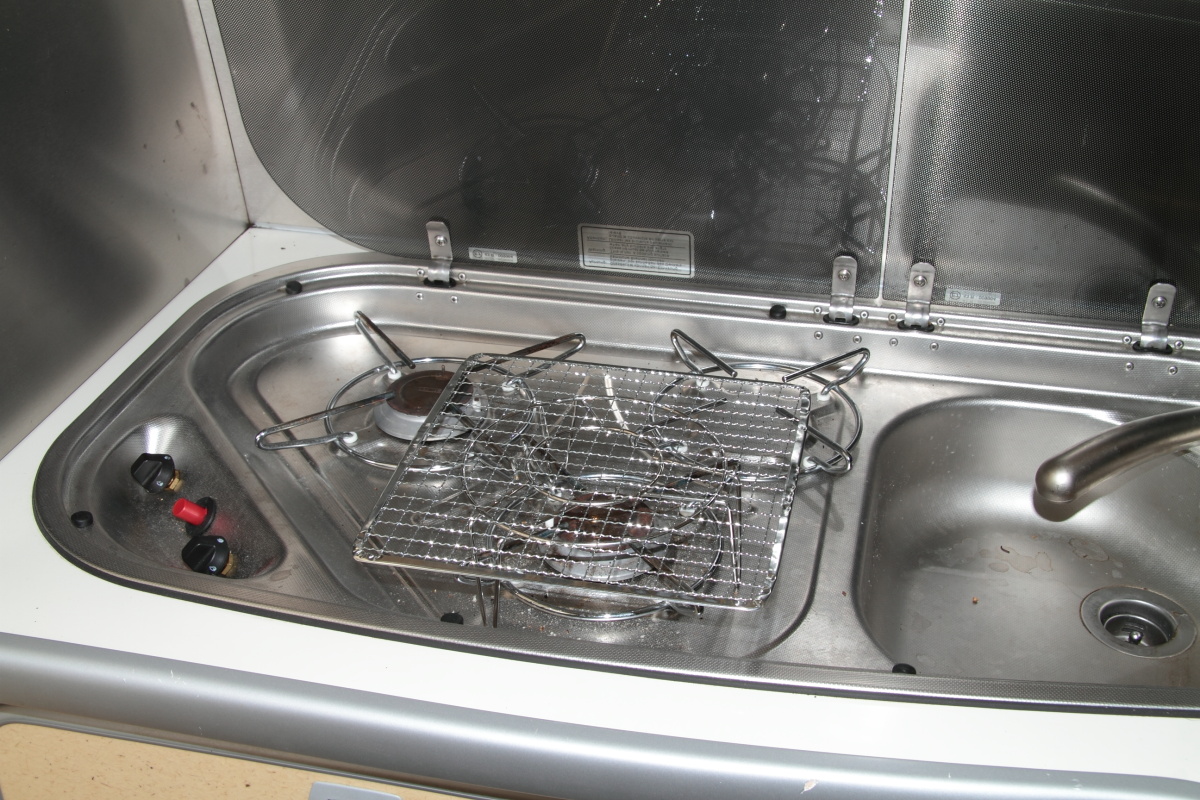
A most time consuming task with acquiring a new camper is to equip the kitchen efficiently. The task requires finding and selecting the utensils that best fit the constraints of the vehicle. The selection criteria include how to secure them while the vehicle is in motion, and each takes up as little precious space and weight as little as possible. My camper is no place for a microwave so out it goes. The precious space now house all the pots and pans. There are 2 sauce pans, a wok, a kettle, and a clay pot. There is also a butane stove for use outside on the occasional spirited stir fry or Chinese clay pot.


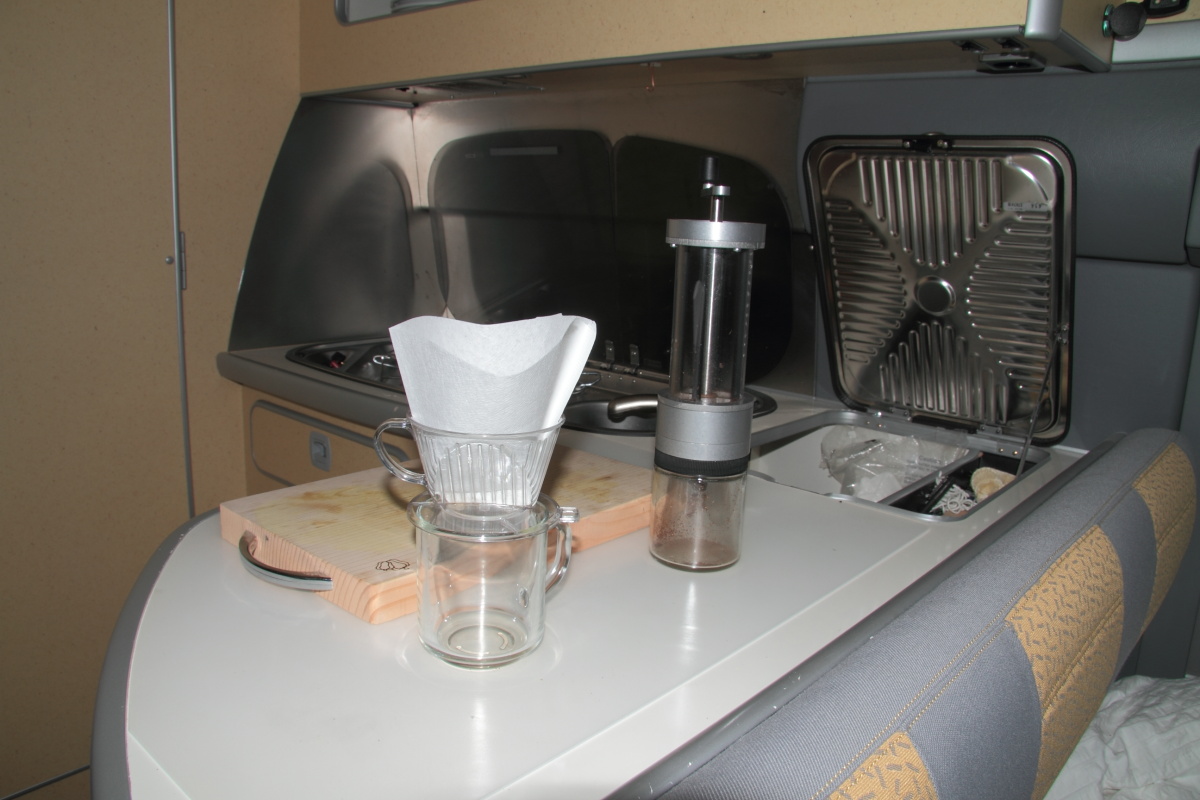
this is a nice hand built grinder with commercial conical burr grinding head - one of the best hand grinder money can buy; i bring my home roast beans for the road
wine cellar
This is my affectionate name for the under floor storage tunnel. I didn't realize it's potential until my recent trip to San Francisco. I stored 15 bottle of Chinese liquor and 24 beers that I acquired on the trip! The cardboard box with the finger holes keep the content tidy in the "cellar".


ikea finds
Plastic towel hooks - kitchen section
Plastic towel hooks - kitchen section


counter top saver - repurposed desk mat (transparent on the main counter surface)
It adds traction to the slippery counter top, and to protect it from abrasion wear.

rubber basket - kitchen section

These basket are very handy for the driver passenger floor to hold all the miscellaneous stuff. They stay put on the slippery plastic flooring.They are pricy for ikea standard because ikea knows people willing to pay for kitchen renovation.
making toast
What do you do when you don't want to carry an electric toaster nor want to fire up the generator so you can make toast?
Japanese/Korean cutting board
I found this beautiful soft wood cutting board in a Korean supermarket. Made in Korea with very tight clear vertical grain. It is 4 time the area of one I use in my previous camper.


it stows neatly on the side of the under sink cabinet.
Where did you purchase the grinder?
ReplyDeleteHi Sunny,
ReplyDeleteI assume you refer to the coffee grinder. It is from Orphanespresso.
http://www.orphanespresso.com/OE-LIDO-Hand-Coffee-Grinder_p_4682.html
You can read all about it on homebarista:
http://www.home-barista.com/marketplace/orphan-espresso-lido-cupping-grinder-t20002.html
May be the best coffee forum in English language.
Great blog, and wonderful ideas. Keep those suggestions coming. I will link to your blog from mine, which has an overlapping purpose and complimentary posts. ( http://gosprinter.blogspot.com ). How about some yummy recipes? Looks like you enjoy cooking.
ReplyDeleteDavid,
ReplyDeleteThanks for the feedback and linking. I am not good for recipes. Most of my cooking is by the seat of the pants so to speak.
Great blog and great ideas! Any pointers for the silvery reflective fabric that you used to make the sun shade? (What store you bought it from, what material is it made of, etc.)
ReplyDeleteSorry for the less than timely reply. The blogspot management tool does not notify me of all the comments that well.
ReplyDeleteFor small project like this I never waste fuel driving around town to look for what I have in mind. I came across this silvery fabric in one Wal Mart one day, and I just estimated how much I need and bought it on the spot.
They have 4 or 5 fabric that are silvery and reflective and I could have chosen any of them. I just chose one that is cheap and silvery (reflective) enough. It is actually quite white with a silver tint. I never bother to note what material, but am sure it is like polyester of sort. If you go to any store that sell good selection of fabric you bound to find one that suit the purpose.
Hi, where did you end up putting the rear view camera multiplexer? I'm looking for a spot for mine. Thanks!
ReplyDeleteI have it ziptied to near the steering column above the brake padel. I used one of the mounting hold of the multiplexer to feed the ziptie thru. Just look up from the floor up along the steering column and you would find something you can secure the box to. I advise using a large tie so it will not break. May be double it to be extra secure.
Deletemany thanks! I was thinking of velcro'ing it under the ECU, I think it might also fit in there. If you still have the template for your brake light gasket I'd love to steal that idea too :)
DeleteI did not make a template except one to transfer the locations for drilling the 2 brake light mounting holes onto the aluminum plate. I just removed the 3rd brake light and laid it onto the sheet of aluminum and traced the outline, then sketched in the peninsula for the camera using round lid of right diameter for the corners. Very easy to do in-situ.
ReplyDelete