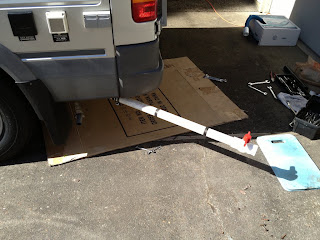
The first step was to make a cut at the 1 1/2" ABS pipe so I could remove the discharge pipe. I didn't want to put stress on the slide valve and it's connection to the grey water tank so I use the Fein Multimaster to make the cut.
the cut was to be made at the middle of the horizontal section of the 1 1/2" ABS pipe
Well the care I took to make the cut was futile. As soon as the two sections are separated there was a stream of water coming out at the joint at the grey water tank spout. Clearly something is not right at the joint and I knew my cut was not the cause.
the phallic symbol removed
to see the cause of the leak I have to remove the entire pipe section with the slide valve
i untwisted the screw joint at the grey water discharge spout
yes, you can see more mess from the professional plumber's work - caulking was what keep the joint from leaking; this is why it leak as soon as the pipe was cut
There was more bad news awaiting me. Clearly someone has cross-threaded the joint. I spent over an hour trying to thread it properly to no avail, including grinding off the bad starting turns of the tread. I then wanted to separate the screw joint from the remainder of the pipe and valve so I can better feel and see if I can thread it back without being steered onto the cross-thread. All of the 4 bolts and nuts were so badly seized from rust that 3 out of the 4 broke. When I screw the joint back it would never tighten onto the plastic seal. Eventually the plastic nut just pop free from the flange. I was so angry with these hill billy engineering Airstream had done.
very unimpressed with this slider valve - i decided to get rid of it and replaced it with a ball valve
I decided to rid the slider valve and all the old pipe section and construct new ones. That mean another trip to Home Depot to get a PVC ball valve. The PVC ball valve would dictate how I fabricate the discharge pipe.
I fabricated the new discharge pipe with a in two sections. A section with ABS pipe fittings and a section with PVC pipe fittings and the 1 1/2" ball valve that forms the tail piece. The two sections are then jointed with a flexible rubber sleeve with stainless steel outer casing. I want the flexible joint to ease the stress on the grey water tank spout. Doing so also avoid the need to glue the ABS fitting with PVC fitting which requires buying an expensive special glue.
Before cutting the pipes and gluing the joints I modified the old 3" hanger clamps into 1 1/2" hanger clamps. That took 45 minutes of elbow grease.
no, no, not this cute baby snake!
this 20-foot Burmese python - right
I took a lot of care to cut and glue each joint to impart the least amount of stress, as well as to cause any interference with moving parts like the sway bar anchor arm.
done!
i also took some care on how to orient the valve for best ergonomics without being too visible
this was how it look before
it pains me to contaminate some many towels with sewer water and toilet cleaning
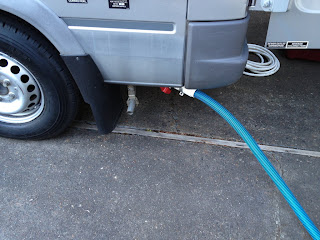
the soft plastic end of the pool hose simply slip into the inside of the 1 1/2" collar and held there by friction
The job could have been under one hour. Because of the crossed thread joint the job turned into a half day job. In all I bought over 25 fittings because I wanted a fitting I might need on hand without taking a trip to Home Depot once I started the work. In all I only used 4.
you can plan all you want and some times with plumbing you never know what you would end up doing


No comments:
Post a Comment